
Import metadata
Upload your metadata CSV under Ingest → Metadata. New to this? Read How ingestion works and Prepare your metadata CSV first.
Before you upload
Open the cog (CSV import settings) next to the upload button:
- Publish new albums (on by default): new albums go live on your site as soon as they import. Switch off to import them unpublished and publish later from Albums. Albums that already exist are not affected either way.
- Reimport audio for existing tracks (off by default): only switch on if the audio for tracks that already exist has changed. Otherwise existing audio is left alone.
Your choices are remembered in this browser. The Metadata help menu offers Download CSV template and Metadata formatting tips.
Upload
- Click Upload CSV and choose your
.csvfile. Only CSV files are accepted. - The file appears in the progress panel at the top while it validates and imports, with counts of tracks and albums done and any failures.
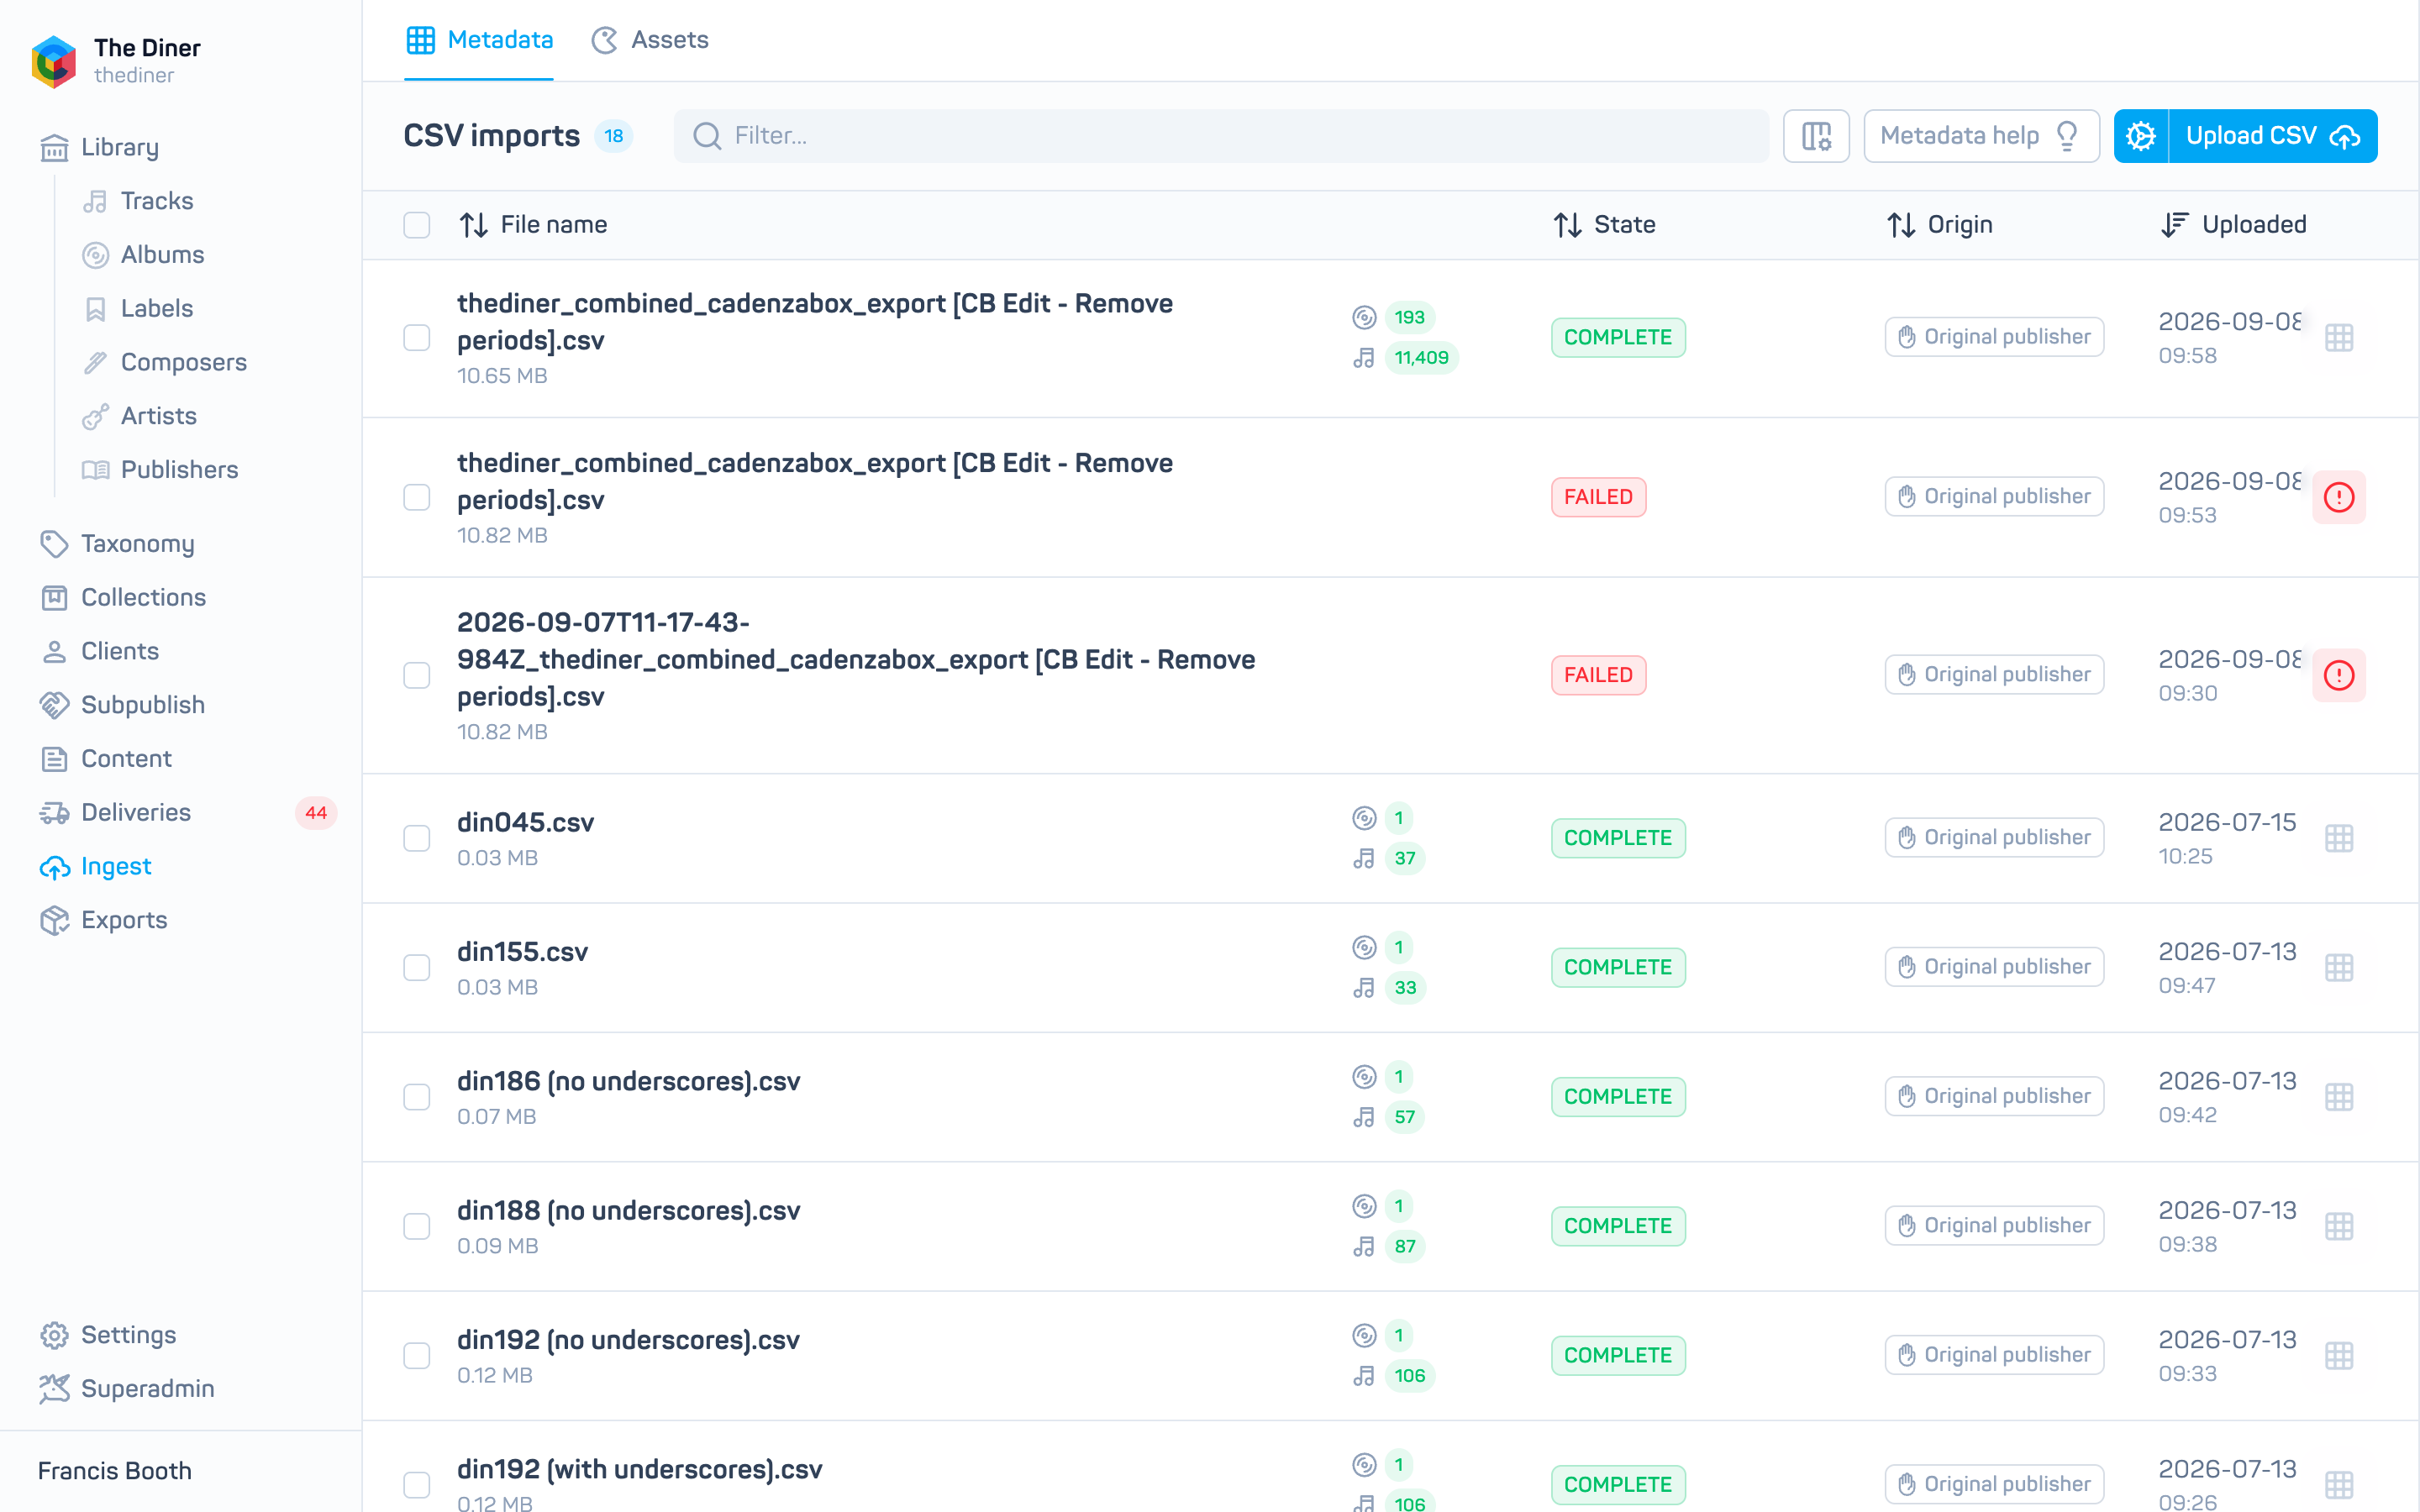
- When it finishes it moves to the table below with a state badge.
| Badge | Meaning |
|---|---|
| COMPLETE | All releases and tracks imported |
| COMPLETE WITH ERRORS | Some releases failed; click the badge or View errors |
| FAILED or INVALID | Nothing imported; see Fix import errors |
The table shows File name and size, album and track counts (green succeeded, red failed), State, Origin (original publisher or subpublished) and Uploaded. Row actions: Rescan audio to look for this import’s audio files again, Download CSV to get the file you uploaded, and View errors.
If an import sits in progress for too long, Cadenzabox staff can mark it failed from the progress panel so you can upload again.
After the import
- Deliver the audio and artwork if you have not already, then rescan. See Deliver audio and artwork.
- Check the sidebar’s Ingest badge: red means files are missing or failed, amber means still processing.
- Review new albums in Albums and publish them if you imported unpublished.